Setting up Eclipse
This document provides a comprehensive, step-by-step guide for setting up your Eclipse Integrated Development Environment (IDE) specifically for JavaFX desktop application development. A correctly configured development environment is crucial for efficient coding, successful compilation, and seamless execution of your applications. This guide covers everything from downloading and installing the necessary JavaFX SDK and Eclipse IDE to configuring them to ensure your projects compile and run successfully, minimizing common setup headaches.
1. Download and Install JavaFX
JavaFX is a powerful, open-source Java library used for developing rich client desktop applications with modern graphical user interfaces (GUIs). It provides a comprehensive set of UI controls, graphics, and media capabilities, making it essential for applications featuring interactive editors, complex charts (like line, Gantt, or bar charts), and other visual components. It is crucial for both compiling your JavaFX applications and for them to run successfully.
-
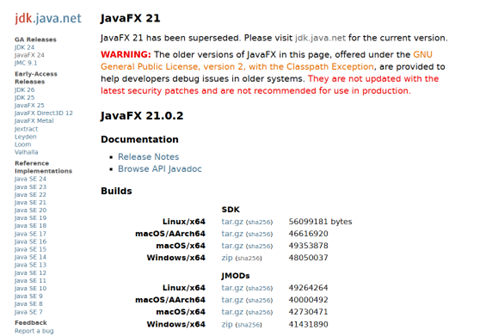
Download JavaFX SDK: Navigate to the official JavaFX download page using the provided link: https://jdk.java.net/javafx21/. You should see a page similar to the one below, where you can select the appropriate SDK for your operating system.
-
Extract the SDK: After downloading, extract the contents of the compressed file (e.g.,
.zipor.tar.gz) to a stable and easily accessible location on your system. A common practice is to place it in a dedicatedJavadirectory, such asC:\Program Files\Java\javafx-sdk-21.0.2\(Windows) or/opt/javafx-sdk-21.0.2(Linux/macOS). Ensure this location is permanent, as Eclipse will reference it directly.
2. Installing Eclipse
Eclipse is a widely used IDE for Java development. For JavaFX projects, selecting the correct Eclipse package and configuring it properly is key.
-
Access the Download Page: Click on this link Eclipse Downloads Page to navigate to the official Eclipse Software downloads page.
-
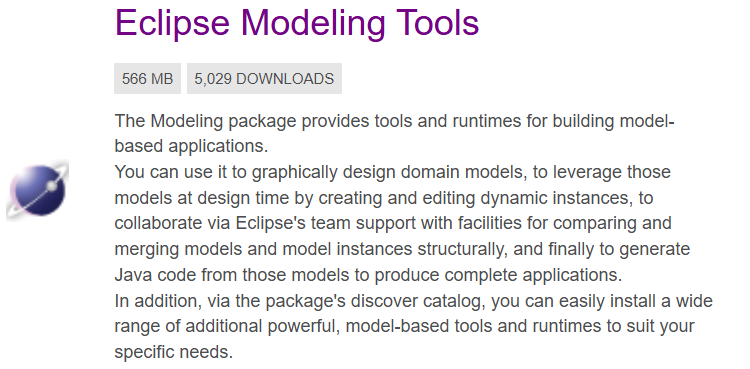
Navigate to Eclipse Modeling Tools: We recommend the 'Eclipse Modeling Tools' package as it often includes a broader set of plugins and features that are beneficial for complex projects, including those involving graphical models and various frameworks.
-
-
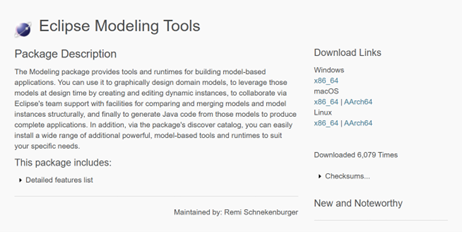
Select the Appropriate Version: On the right-hand side of the page, you will find the download option for different operating systems. Choose the one that matches your device:
-
Windows
-
MacOs
-
Linux
-
-
Initiate the Download: Once you select the correct version for your system, the download will begin automatically.
-
Unzip and Launch Eclipse: After the download completes, unzip the Eclipse-modeling file to a preferred location (e.g.,
C:\eclipse\). Navigate into the unzipped folder and launch Eclipse by clicking on theeclipse.exeapplication. Upon first launch, Eclipse will prompt you to select a workspace. Choose a dedicated directory for your projects; this workspace will store your project metadata and settings. -
Install e(fx)clipse: To enhance Eclipse’s support for JavaFX development, you need to install the e(fx)clipse plugin. This plugin provides essential tooling, such as FXML editors, CSS tooling, and project wizards for JavaFX.
-
Click on the
Helpmenu in the top menu bar, then selectEclipse Marketplace.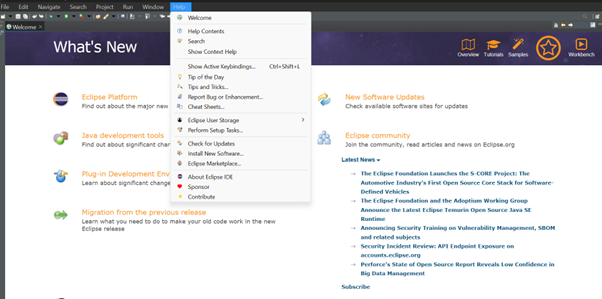
-
In the Eclipse Marketplace dialog, search for
e(fx)clipse. Click theInstallbutton next to the e(fx)clipse entry and follow the on-screen prompts. You will likely need to restart Eclipse after the installation is complete.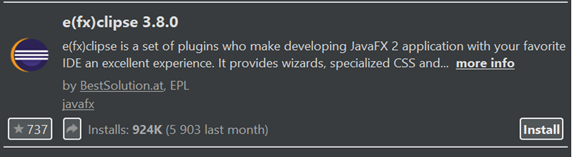
-
3. Configure JavaFX Library Path in Eclipse
After successfully installing Eclipse and the e(fx)clipse plugin, the next critical step is to configure the path to your locally installed JavaFX libraries within Eclipse. This configuration is vital because it tells Eclipse where to find the necessary JavaFX runtime components and development tools. Without it, your JavaFX desktop applications will not compile correctly, leading to build errors, and will fail to run.
|
This setup must be repeated for every new Workspace you create on Eclipse. Eclipse does not carry JavaFX settings from one Workspace to another, so be sure to complete this step whenever you start with a new Workspace. This ensures each workspace is self-contained with its JavaFX environment. |
Do the following:
-
Open Preferences: In Eclipse, go to the
Windowmenu (orEclipsemenu on macOS) and selectPreferences(usually at the bottom of the dropdown).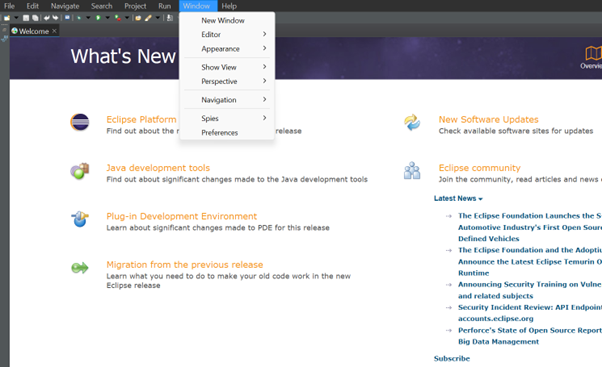
-
Navigate to JavaFX Settings: In the Preferences dialog, use the left-hand navigation pane to find and click on the
JavaFXitem. This will open the JavaFX configuration options. -
Specify JavaFX SDK Path: In the
JavaFX 11 + SDKfield, enter the full absolute path to the root directory of your extracted JavaFX SDK. This directory typically contains alibsubdirectory, which holds all the essential JavaFX.jarfiles. For example, if you extracted the SDK toC:\Program Files\Java\javafx-sdk-21.0.2\, you would enter that path here.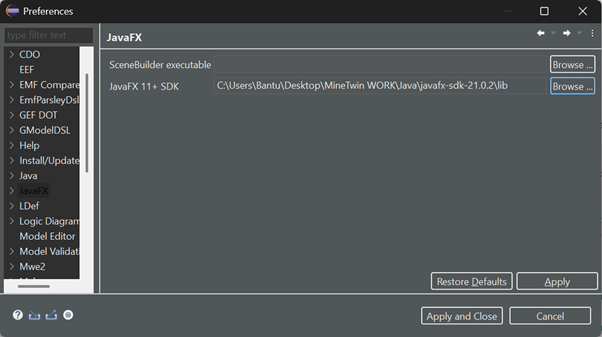
-
Apply and Close: Click the
Apply and Closebutton to save your changes. Eclipse will now be aware of your JavaFX installation and can correctly compile and run JavaFX projects.
4. Clone a project from GitLab
Cloning a project is the process of creating a local copy of a remote Git repository. This allows you to work on the codebase on your local machine, make changes, and then push those changes back to the remote repository. For this section, we will use GitHub Desktop as a graphical user interface (GUI) for Git, which simplifies many common Git operations. However, the underlying principles apply to any Git client or the command line.
4.1. Gitlab Homepage
-
Copy Repository URL: Navigate to your project’s homepage on GitLab. Locate the
Codebutton, usually on the right-hand side of the project overview. Click the dropdown arrow next to it. You will typically see options for cloning viaHTTPSorSSH. For most users,HTTPSis simpler to set up initially. Copy the provided repository URL.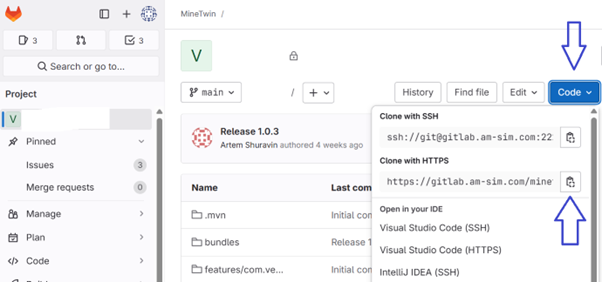
4.2. Paste in GitHub Desktop
-
Launch GitHub Desktop: Open GitHub Desktop on your device. In the top menu bar, click on
File, then selectClone repository…from the dropdown menu.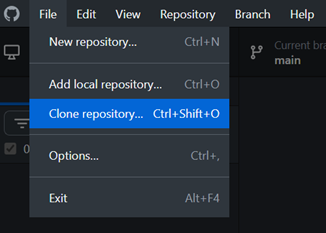
4.3. Pasting the URL copied
-
Enter Repository URL and Local Path: In the
Clone a repositorywindow, select theURLtab. Paste the repository URL you copied from GitLab into the designated field. Below this, specify the desired local path on your computer where you want the project to be cloned. Choose a logical and easily accessible directory for your development projects.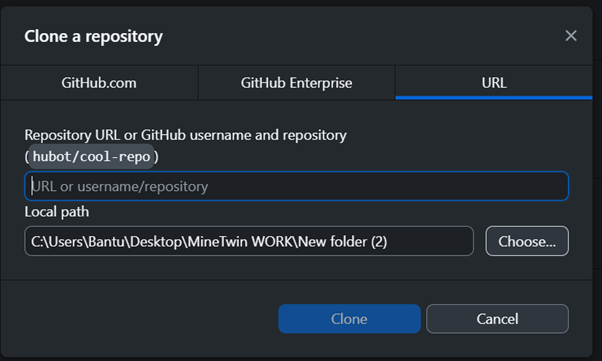
5. Importing a project in Eclipse
After cloning your project to your local machine, the next step is to import it into Eclipse. This process tells Eclipse about your project’s structure, source folders, libraries, and build paths, allowing the IDE to correctly compile, run, and manage your code. Simply having the files on your disk is not enough for Eclipse to recognize them as a project.
5.1. Open Eclipse
-
Initiate Import: In Eclipse, click on
Filein the top menu bar, and from the dropdown menu, selectImport….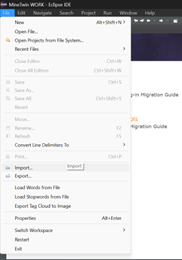
5.2. Import Window
-
Select Import Type: In the
Importdialog, expand theGeneralfolder and select theExisting Projects into Workspaceoption. This is the correct choice when you have already cloned a project from a version control system (like Git) to your local file system.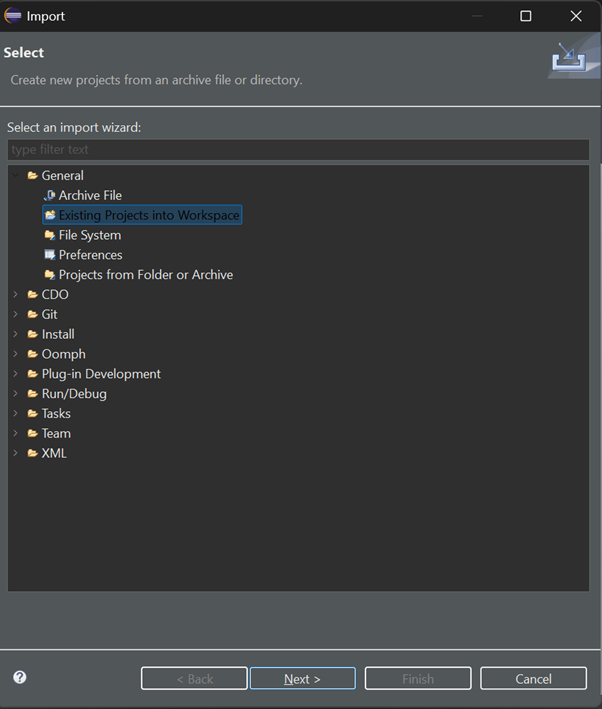
5.3. Importing a Project
-
Browse and Import: In the
Import Projectswindow, clickBrowse…and navigate to the root directory where you cloned your project. Eclipse will then scan this directory for recognizable project structures. It’s often beneficial to check the optionSearch for nested projectsif your repository contains multiple sub-projects or modules, as this will allow Eclipse to find and import all of them simultaneously. Finally, clickFinishto complete the import process.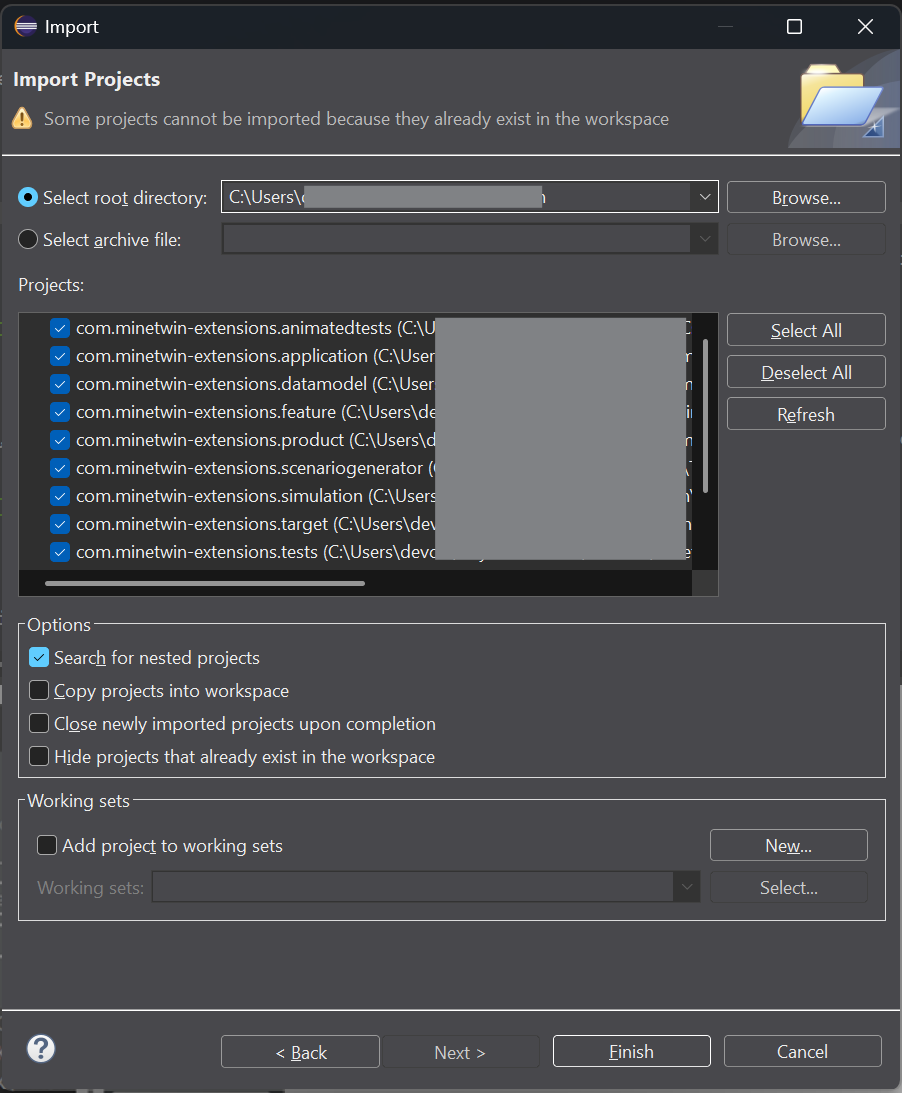
|
After importing, Eclipse might automatically start building the project. If you encounter any build errors or unresolved dependencies, try performing a |
6. Running the Application
Once the workspace is configured:
|
In this training, wherever you see |
-
Reload the target platform.
-
Open
releng > com.~.target > com.~.target.target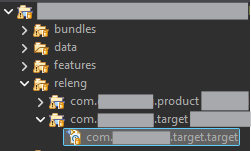
-
Click
Reload Target Platformat the top right of the window.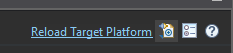
-
Wait while this completes - the first time can take a few minutes. You can see the progress at the bottom right of the Eclipse application.
-
-
Run the MineTwin application from the product folder within Eclipse.
-
Open
releng > com.~.product > com.~.product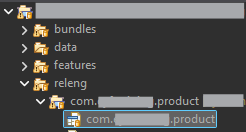
-
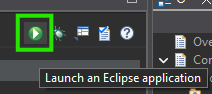
Click the green play button at the top right of the window to launch the application.
-
|
Troubleshooting JavaFX Errors
If you encounter |