Git & GitLab Workflow: Online Workflow, Merge Requests, and Pipelines
This guide establishes the standard development practices for integrating your local code into the main project. Once you have written and committed your code locally, the online workflow ensures that your contributions are reviewed, tested, and safely deployed to our servers.
1. The Online Workflow: Merge Requests (MRs)
Once your feature branch is pushed to GitLab, it is time to integrate your code. You do this through a Merge Request (MR).
1.1. Creating the Merge Request
A Merge Request is your official proposal to merge your feature branch into the main branch.
-
Initiate: Navigate to your project in GitLab. Usually, a blue banner will automatically appear at the top of the screen shortly after you push a new branch, prompting you to "Create merge request". Click this.
-
Assigning Reviewers: In the MR creation screen, assign a lead developer or your trainer as the Reviewer.
-
Linking Issues (Crucial Step): Always include a keyword and the issue number in your MR description (e.g.,
Closes #123orFixes #123). GitLab is smart enough to read this; when your MR is approved and merged, GitLab will automatically close the linked issue on the Kanban board, keeping our project management clean without manual updates.
Once your local branch is updated, tested, and pushed to GitLab, you can proceed to create the Merge Request (MR). This formally proposes your changes for review and integration.
-
Initiate MR: Navigate to your project on GitLab. You should see a prompt indicating that a new branch has been pushed and an option to
Create merge requestwill be available. Click on this button.
-
Fill out MR Details: The
Create merge requestwindow will open. Here, you need to provide clear and comprehensive information: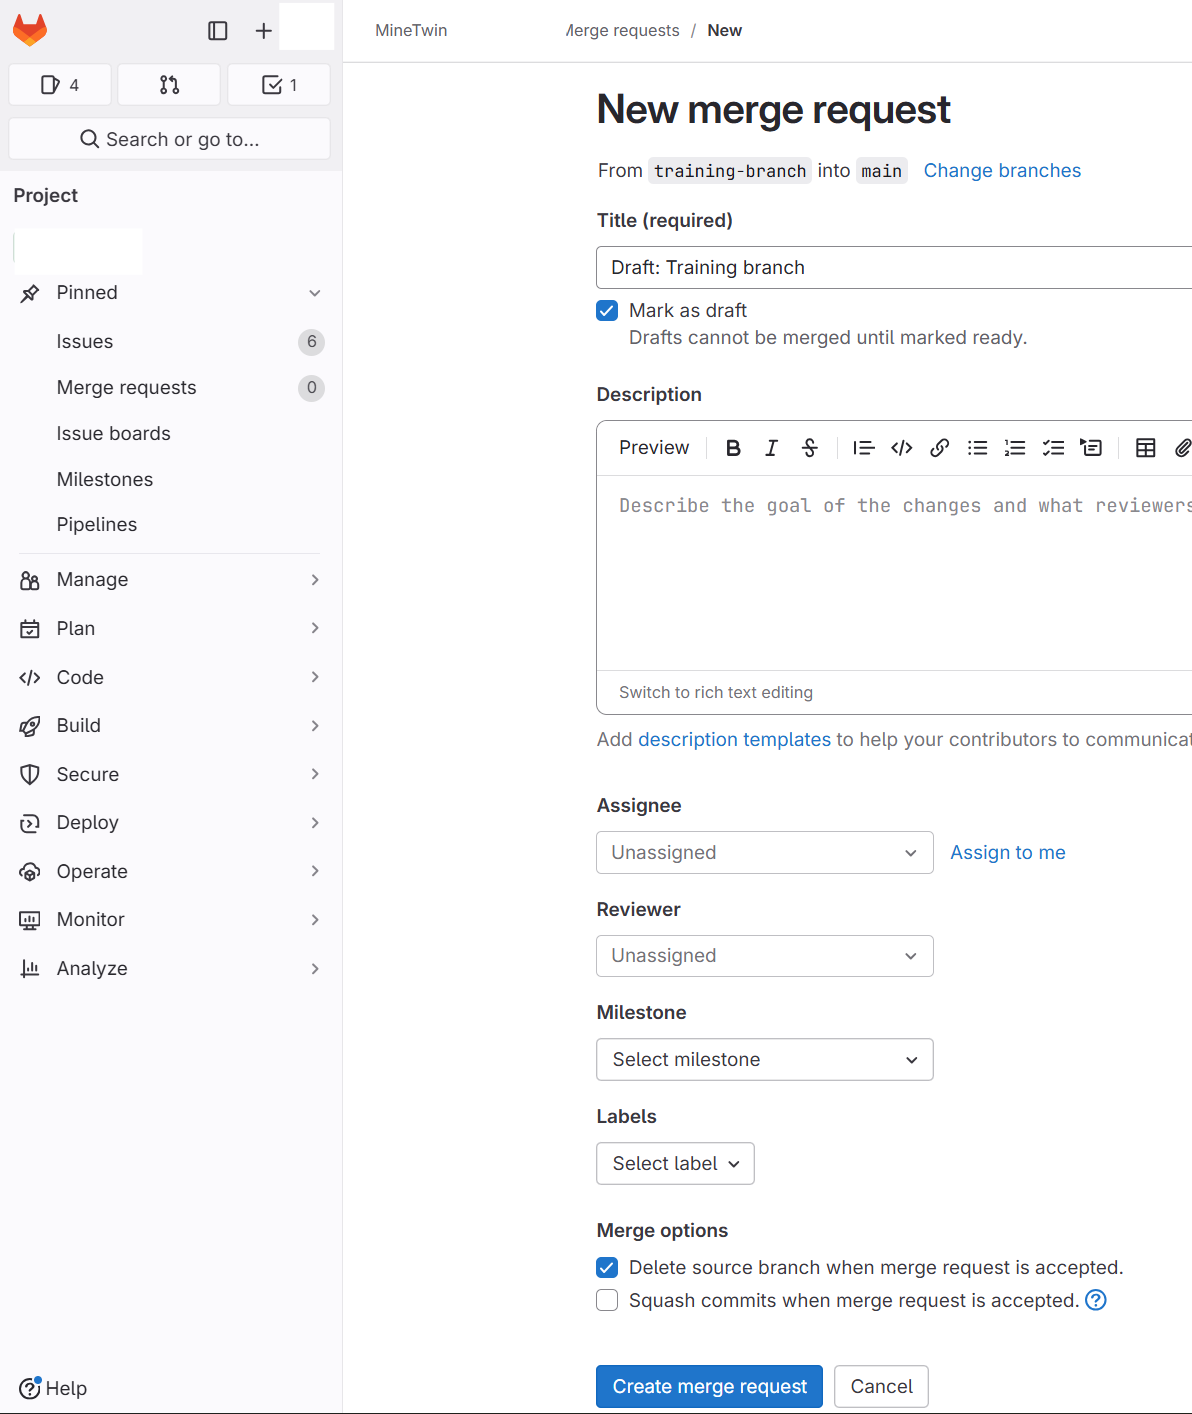
-
Description: This is critical for reviewers. Clearly describe:
-
What problem does this MR solve? (Link to relevant issues, e.g.,
#123). -
How does it solve it? (Brief overview of changes).
-
What testing has been performed? (Mention local unit/integration tests).
-
Are there any specific areas for reviewers to focus on?
-
Include screenshots or video demonstrations if applicable.
-
Assignee: Select the individual primarily responsible for overseeing the MR to merge it.
-
Reviewers: Assign specific team members as reviewers. Their approval is typically required before merging.
-
Labels: Apply relevant labels for categorization, priority, and workflow.
-
Milestone/Epic: Link the MR to any relevant milestone or epic for project tracking.
-
-
Submit MR: After filling in all the details, click
Create merge request.
1.2. Troubleshooting Merge Issues
Encountering issues during the Merge Request process is common. Here’s how to troubleshoot some of the most frequent problems:
-
Merge Conflicts: These occur when changes in your branch overlap with changes in the target branch (
main).-
Resolution: The best approach is to
Update your branch from main(as described in the "Prepare Your Branch for Merge" section) and resolve conflicts locally before pushing again. Git will mark the conflicting sections in your files, and you’ll need to manually choose which changes to keep.
-
-
Stash Errors: If you’ve used Git
stashto temporarily save changes, these can sometimes interfere with merging or pulling.-
Resolution: Before attempting a merge or pull, ensure your working directory is clean. If you have stashed changes, either
git stash applyand resolve conflicts, orgit stash dropif the stashed changes are no longer needed. Alternatively,git stash clearwill remove all stashed entries.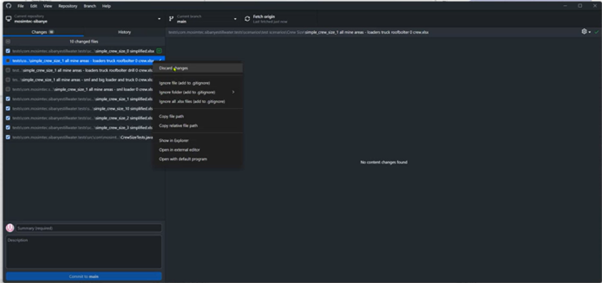
-
-
Branch Naming Conflicts: This can occur if you try to create a branch with a name that already exists, or if there are inconsistencies between local and remote branch names.
-
Resolution: Carefully verify the names of your local and remote branches. If a branch is truly unused, you can
git branch -d <branch-name>(local) andgit push origin --delete <branch-name>(remote) to remove it. Always double-check that you are deleting the correct branch.
-
By systematically addressing these common issues, you can ensure a smoother and more efficient Merge Request workflow.
1.3. The Review Process
Code review is not about finding faults; it is about sharing knowledge and maintaining code quality.
-
The assigned reviewer will look at the side-by-side code diffs (what was removed vs. what was added).
-
They may leave comments directly on specific lines of code.
-
You may need to make additional commits to your branch to address their feedback. Once the reviewer is satisfied, they will approve and merge the code into
main.
The Changes tab within the Merge Request is a powerful tool for both the author and the reviewer to understand the modifications made.
-
View Changes: Click on the
Changestab of your merge request.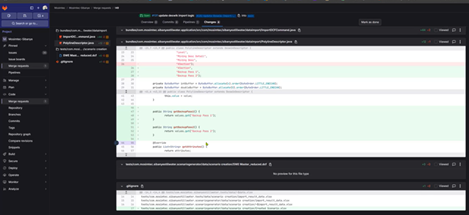
-
This view shows a side-by-side comparison (diff) of the files changed in your branch compared to the target branch. It highlights additions, deletions, and modifications.
-
Reviewers can add comments directly to specific lines of code, fostering precise feedback and discussion.
-
2. Deployment & Builds (Pipelines)
Once code is merged, it needs to be built into a usable application. We use GitLab Pipelines to automate this process. GitLab CI/CD pipelines are automated workflows that run a series of jobs (e.g., build, test, deploy) whenever changes are pushed to your repository. For Merge Requests, pipelines automatically validate your changes against the project’s standards and requirements.
We distinguish between formal release builds and quick-access intermediate builds.
2.1. Formal Builds (Releases)
Formal builds are used for production releases. These are permanent versions of the application.
-
Navigate to Pipeline View: In GitLab, navigate to your project and click on
CI/CD → Pipelinesin the left-hand sidebar. Here you will see a list of all pipelines, including those triggered by your Merge Request.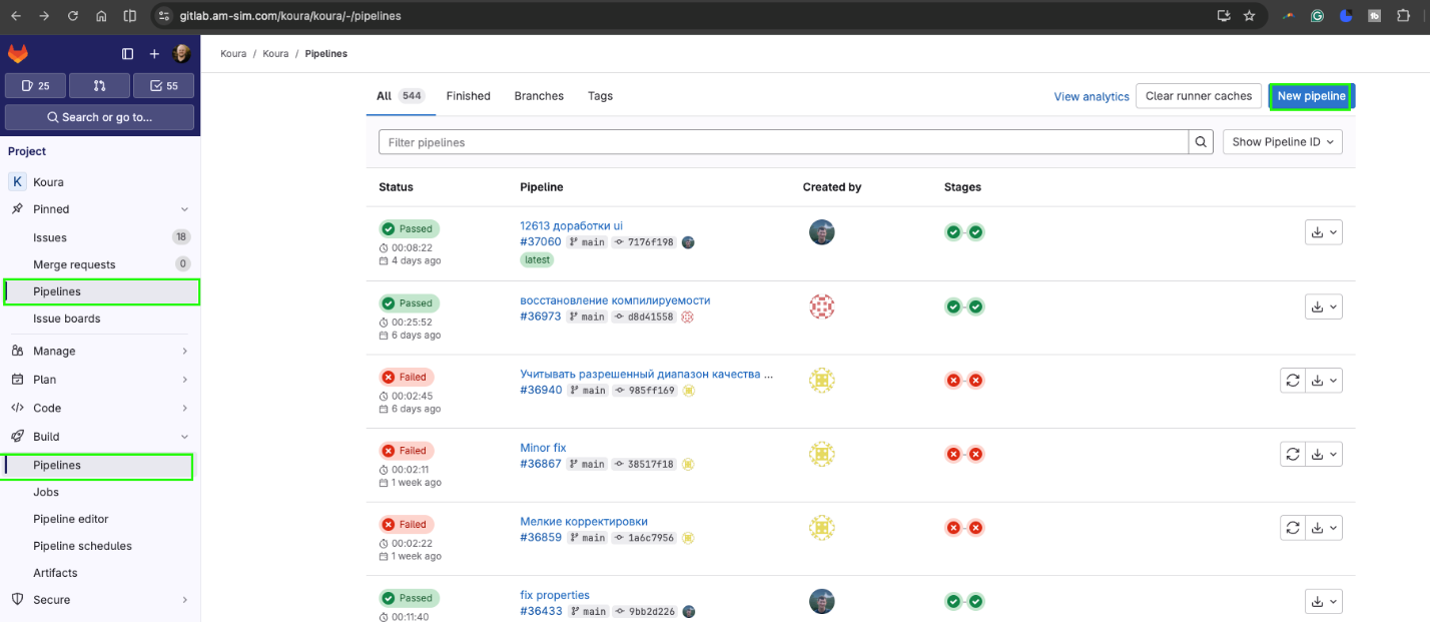
-
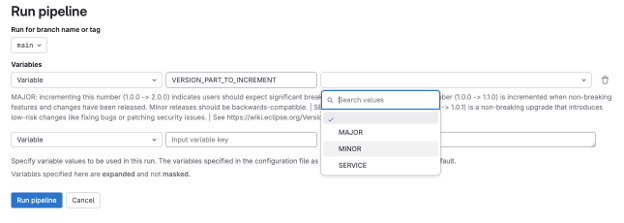
Click Run pipeline (or 'New Pipeline') and select the branch you wish to release (usually
main). -
If prompted by variables, increment the version number (Major, Minor, or Patch) based on the scope of your changes.
-
The pipeline will compile the code, build the artifact, and automatically push it to our Nexus repository (our secure, long-term storage for software releases).
2.1.1. Pipeline features
-
Pipeline Stages and Jobs: A pipeline typically consists of multiple stages (e.g.,
build,test,deploy), each containing one or more jobs. You can click on a pipeline run to see the status of each job. If a job fails, you can click on it to view its detailed logs and identify the cause of the failure.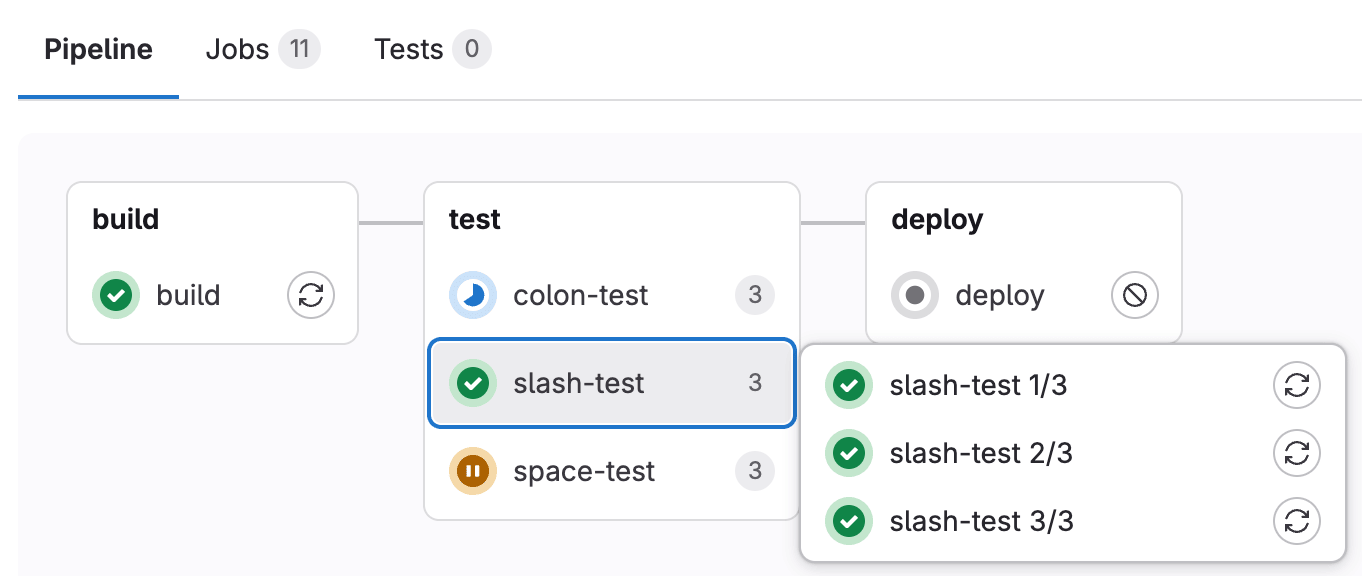
-
Auto-Merge Feature: GitLab offers an
Auto-mergefeature that can significantly streamline the integration process. If all pipeline jobs pass successfully, you can set the MR to auto-merge. This queues the merge to happen automatically once the target branch is ready (e.g., after other MRs have been merged).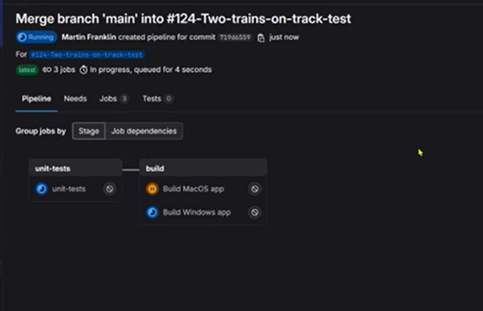
-
Benefits: Reduces manual intervention, speeds up integration, and ensures that only code that passes all checks is merged.
-
|
Branch Deletion: After a successful merge, it is a best practice to delete the source branch (your feature/bugfix branch). GitLab often provides an option to do this automatically upon merge. Deleting old branches keeps the repository clean and reduces clutter. Manual Pipeline Run (if needed): In some cases, you might need to manually trigger a pipeline, for example, to run a specific job or to test changes on a particular branch. You can do this by navigating to |
2.2. Intermediate Builds (Testing)
Sometimes you need to test your code in a built state quickly without pushing a permanent release to Nexus.
-
Navigate to Build > Pipelines and click Run pipeline.
-
Select your specific developer branch (not
main). -
Once the pipeline initializes, you will see a list of manual jobs in the pipeline graph. Click the Play button next to the desired build job.
-
Important: When the job finishes, download the resulting application from the Artifacts section on the right side of the job page.
|
Intermediate artifacts are temporary and will be automatically deleted by GitLab after a few hours to save server space. |
3. Master Exercise: Full Git Lifecycle
To demonstrate your mastery of the MineTwin workflow, complete the following end-to-end task. This exercise covers the content from all three workflow guides.
Task: Make a change to the Read.md file to ensure your Git workflow is functional.
-
Issue: Create an issue in GitLab following the SCR format. Assign it to yourself and add appropriate labels.
-
Branch: Open your Git UI, Fetch from origin, and create a branch named
feature/issue-[Number]-[YourInitials]-Training. -
Edit: In Eclipse, navigate to the Read.md file. Make a minor text change, for example
My git workflow test!. Save the file. -
Commit/Push: Stage your new file, commit it with the message "Add dummy test for training," and push the branch to origin.
-
Merge Request: Create the MR in GitLab, ensure your description says
Closes #[YourIssueNumber], and assign the trainer as the reviewer. -
Verification: Watch the trainer’s screen as they review your code diff, comment, and merge your branch. Verify that your Kanban board issue closed automatically!